Showing posts with label cars. Show all posts
Thursday, 5 March 2015
Name Road Mats for Car Enthusiasts
Over the last couple of weeks, Wugs and Dooey have been enjoying these name road mats. Wugs has been doing some name recognition activities at his preschool, so I thought that combining his interest in cars with the letters of his name would be a fun way for him to remember it.
(My apologies for not displaying the mats in full on the blog - I like to keep the names of my sons private. Hopefully the idea can still be shared through the photos I have taken).
What we used:
Two sheets of A2 white paper
Coloured black pencil
White sticker labels (white markers on the road)
Light and dark green foam paper (fields)
Black foam paper (concrete land)
White foam paper (railway tracks)
Black marker pen (railway tracks)
Blue perspex (lakes)
Contact paper
Wooden painted blocks (shops and trees)
Glue
Cars and trains
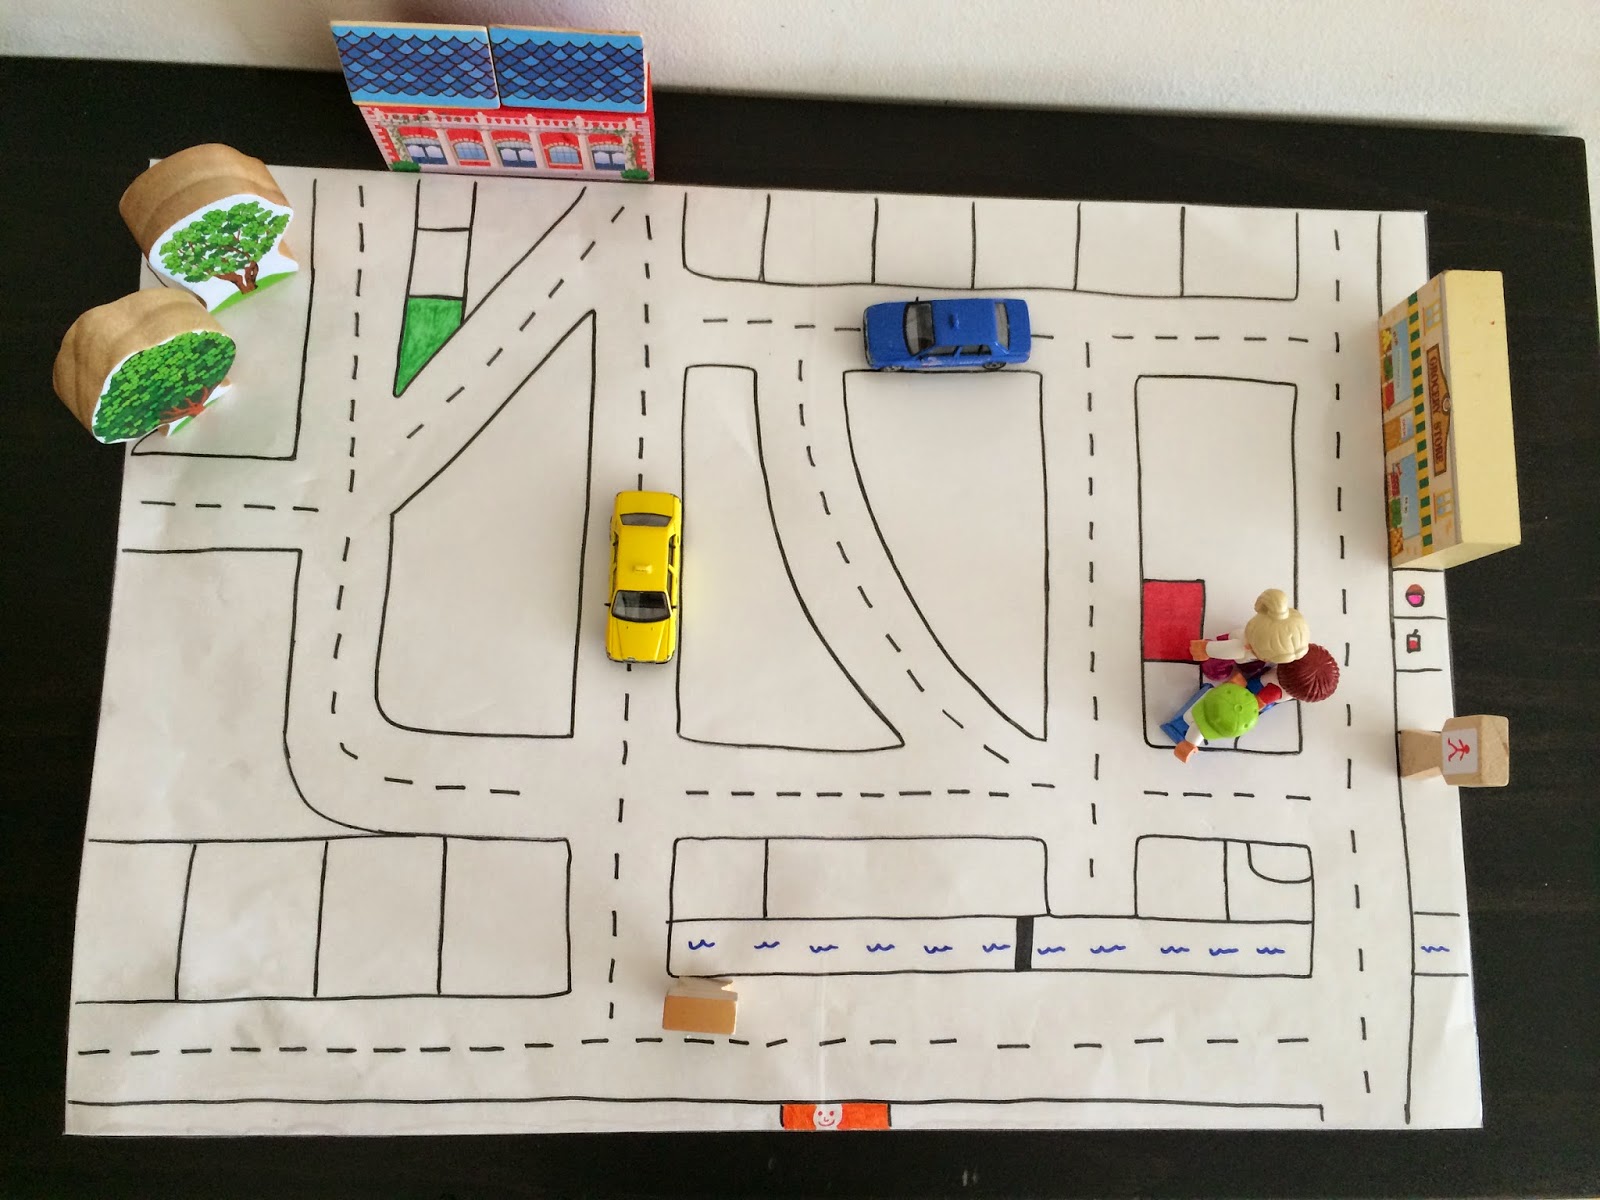
The mats were a bit of an experiment and whilst working on them, I wasn't sure if I wanted the landmarks to be permanent features or not and whether I would draw them on or cut out the shapes from different materials. I'm not great at drawing, so I decided to make some of the features permanent (green areas, concrete areas, lakes and train tracks) and some of them changeable (the wooden block buildings, trees and sign posts).
I drew the letters on the paper and coloured them in black/grey and added the white labels as the road markings. Then I covered each sheet with contact paper. I built up the landmarks around the letters using a very strong glue to stick the features to the contact paper. (As each name has different letters, the boys had their own unique road mats with similar features - each had a lake, green space, a concreted area and a railway track running through it).
The making of the mats was not that easy for a few reasons (and hopefully by mentioning this, I can make the process smoother for anyone else who wishes to make one): Firstly, I decided to colour the letters by using coloured pencil. The contrast of black and white can be a bit garish, so I was going for a softer look. Clearly it has been years since I have coloured using a coloured pencil as I hadn't anticipated that the black/grey from the pencil would smudge over the white parts of the mat and that the colouring process would take so long! In the end, I cut out the letters and stuck them to a new sheet of paper. I would recommend drawing the letters on to paper that is already coloured grey/black. Secondly, I had to cover the paper with contact paper (double-sided sticky tape) if the mats were going to survive at the hands of my toddler. This led to a bit of a fight with the contact paper... but we got there in the end! In my experience, there isn't a perfect way to cover paper using contact paper. Hopefully it isn't necessary to use it (unless you have a child who eats everything of course...which I do!)
Monday, 21 July 2014
"Where I Live" Small World Play
A couple of months ago, Wugs and I were in a taxi on our way home from shopping and he kept uttering over and over "second condo on the right". I had no idea what he was referring to until we approached our condo and I leaned forward and said to the taxi driver, "Second condo on the right please". Wugs was so familiar with me providing directions to the taxi drivers that he was beginning to remember them. It occurred to me that it would be really useful for him to learn how to get home if we were separated.
What we used:
A2 size paper
Contact paper/sticky back plastic
Marker pens
Stickers
Cars
Figurines
Modular buildings
I tore off a piece of paper from our A2 pad and drew out a basic map of where we live, making the roads large enough for Wugs to drive his cars down. I drew a few landmarks on the map that are special to Wugs (the juice shop, the cupcake shop and the play gym). Then I covered the map in contact paper. (This turned out to be a very wise thing to do as the map was attacked by Dooey and water was spilt over it). Finally I scattered a few modular buildings and signs and added the Singapore taxis.
We went through the main route that taxis take to our condo pointing out the landmarks on our way. As I have been teaching Wugs about traffic lights (that green means "go" and red means "stop"), we went through the different scenarios together involving "the little green/red man". I didn't have a sign for this, so I adapted one using stickers and coloured pens and we played out the scenario of crossing the road with Lego figures. Wugs spent at least an hour playing with it and talking about the cars being dangerous and turning left and right. This was probably one of his favourite small world plays and it was so easy and cheap to make.
What we used:
A2 size paper
Contact paper/sticky back plastic
Marker pens
Stickers
Cars
Figurines
Modular buildings

We went through the main route that taxis take to our condo pointing out the landmarks on our way. As I have been teaching Wugs about traffic lights (that green means "go" and red means "stop"), we went through the different scenarios together involving "the little green/red man". I didn't have a sign for this, so I adapted one using stickers and coloured pens and we played out the scenario of crossing the road with Lego figures. Wugs spent at least an hour playing with it and talking about the cars being dangerous and turning left and right. This was probably one of his favourite small world plays and it was so easy and cheap to make.
Thursday, 4 July 2013
Cars in the City Small World Play
My inspiration for this activity came from the craft website The Imagination Tree. I loved the idea of creating a small world play within a suitcase, so I was delighted to discover these little suitcases on sale in my local craft store, Spotlight. I based the scene (roughly) on Singapore's business district with the skyscraper, river, bridge, palm tree and the yellow and blue Singapore taxis. Wugs adores cars and in particular running his cars over different surfaces, so I created the bumpy ramp from an old cardboard box and car parking area from two rubbery heat resistant mats. I wanted the scene to be multi-sensory so I used materials of different textures (clear coloured paper, perspex, foam, card, felt, wood etc) and I glued everything down as some of the parts were too small for an 18 month old.
I have plans to extend this small world scene to incorporate a felt road mat with Singapore landmarks on it that could be laid outside of the box so that the car that comes down the ramp would land on the mat. The mat could then be folded up and placed in the box when not in use.
Wugs loved this small world play and enjoyed opening and closing the suitcase and carrying it around. We bring out the suitcase only occasionally so that Wugs continues to treat it as something special.
What we used:
Small suitcase
Card
Foam Sheets
Perspex
Coloured ("sweet wrapper") paper
Craft sticks
Pom poms
Felt
Heat resistant mats
Cardboard box
Paint
Glue
Scissors
Subscribe to:
Posts (Atom)